Shopping Experience
At Zovatti, we want to present you with a personalized shopping experience ensuring that you receive the time piece that best fits you. Click below to begin.

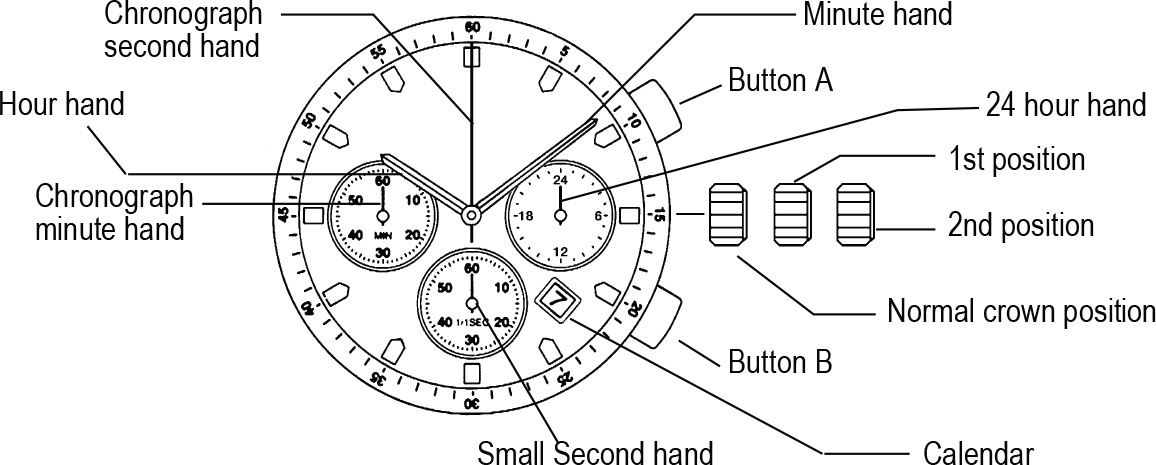
WATCH DIAGRAM
CHRONOGRAPH DIAGRAM

SETTING THE TIME
SETTING THE DATE
*If the date is set between the hours of around 9:00 PM and 1:00 AM, the date may not change on the following day.
USING THE CHRONOGRAPH
This chronograph is able to measure and display time in 1/1 second united up to maxinum of 11 hours 59 minutes 59 seconds.
The chronograph second hand keeps continuously for 11 hours 59 minutes 59 seconds after starting.
Measuring time with the chronograph
The chronograph can be started and stopped each time button “A” is pressed.
Pressing button “B” resets the chronograph and the chronograph second hand and chronograph minute hand return to zero position.
CHRONOGRAPH RESET
This procedure shoud be performed when the chronograph second hand does not return to zero position after the chronograph has been reset, and including after the battery has been replaced.
Pull the crown out to the 2nd position.
Press button “A” to set the chronograph second hand to the zero position. The chronograph hand can be advanced rapidly by continuously pressing button “A”.
Once the hand have been zeroed, return the crown to the normal position.
* Do not push crown to normal position while the chronograph second hand returns to zero position.It stops on the way when crown are returned to normal position and its position is recognized as zero position.
* Do not push crown to normal position while the chronograph second hand returns to zero position.It stops on the way when crown are returned to normal position and its position is recognized as zero position.
BATTERY TYPE AND REPLACEMENT
This time peice uses battery type: SR927W
Backing plate can be removed using a plastic pry tool, the battery can then be replaced, and the backing plate pressed back on and secured using light pressure.
DATE OF UPDATE
05/28/2022